Another small linux astronomy software review

This is a newer version of my post regarding linux astronomy software. Most of the programs mentioned in my previous article are updated constantly so there’s no need to re-dig these. Some new (or maybe unknown to most) apps could be of great assistance to your collection. I still believe that the best software for you is the one that you know to use best but sometimes we need more features or more automation to possible calculations or planning for our observations. For example i really like xephem but its so feature-complete that sometimes its scary!So, here we go..

For those with windows background i’m sure you had Virtual Moon Atlas installed for these bright full moon nights. Maybe justmoon is a bit old (but still kickin) so VMA has now a linux port with an installer to make our life easier. I found it a bit buggy or maybe it was my faulty configuration but anyhow its an atlas and its very usable. The search tool is very practical and i found especially nice the option to use a *very* high resolution texture for moon. You get very nice and detailed views and feels pretty much like moonwalking 😉

For all you aavso explorers fear not! Xvarstar is here to make your difficult task less cumbersome. Its main task is to search the GCVS catalogue for entries with criteria such as star name, magnitude, type, constellation, amplitude and of course a combo of all the above.

Another very interesting tool is ORSA. Its an interactive app used for computation and simulation of celestial mechanics. Asteroids, comets, artificial satellites, Solar and extra-Solar planetary systems can be accurately reproduced in your screen. It’s very nice to know how all this greatness works..

Where is M13? is a nice reference tool for dso. Every amateur astronomer should have this installed, because its another digital atlas for deep sky objects with many physical and positioning information. Knowing where an object is, in galactic terms (galactic coordinates) makes you understand where it actually is from a way different point of view.

Now, some apps for amateur telescope making. Most of these if not all, are for windows but have been tested with wine and dosbox and they seem to work flawlessly.

Aberrator is a freeware utility that creates planetary and star images that will be shown by your telescope along with possible distortions that me be produced. In the home page you will find some info about 3 optical design apps written by advanced amateur telescope makers.

Newt has been mentioned in my previous post. Just wanted to add that version 2.0 can be used with dosbox. A trully awesome application.

Last but not least, we have PLOP. It shows you how you may build an optimal mirror cell for your mirror, by providing you with info about possible errors in your build, an automatically generated mesh so you may be able to visualize your cell’s properties and show the graphical thermal distribution on your mirror. A must for any amateur telescope maker.
Minimalistic Set of Eyepieces

I spent some time the past days searching for a minimalistic eyepiece set, in order to minimize the weight added in my observation sessions with my 10″ f/5 travel dob. After all christmas is near and i want gifts!! I wanted to gather up three or four pieces including a barlow to be able to achieve as many as possible and variable magnifications as possible. After doing some research using different calculations for a set of different telescope magnifications i ve reached the following result..

– 32mm Televue Plossl (or maybe a GSO but anything in that length..) as a finder, starhopper, DSO allarounder… If you got the buck hit a 27mm Panoptic…its great.. This eyepiece will be replaced by a 2″ derivative.. It gives me 39.7x, 79.4x Barlowed (but i dont need that) and a wooping 1.25º true field of view.

– 13mm Televue Nagler T6 (everything in that length with a bit of wide field). This one is ideal for bright objects, movement observing, comet hunting and others. One of the grooviest eyepieces 😀 It gives me 98x, 196x barlowed and 0.83º true field of view.. not bad.. So with one eyepiece i have almost 100x and 200x..


– 9mm Televue Nagler T6 (same as above). With this i can take a close look in almost anything.. from moon to nebulae and galaxies. It provides me 141.1x, 282.2x and 0.56º true field of view.

– 9mm Baader/UO orthoscopic (_optional_… i would take that with me only to study the moon or close planets..). This is ideal for planetary and moon work.. I can achieve very good magnifications but i have to move the secondary cage to stay in track of orbit. Very small field of view but great views and colors…

– Barlow 2x. Provides more magnification and a bit of FOV. Its a necessity in a small all arounder set. My opinion goes to Televue Barlow 2x or if you want a shorty i would go for Celestron Ultima 2x.

Im not a televue junkie… My favorite views were from Clave eyepieces but i have not been able to aquire one.. 😦 The ideal and most cost efficient for me is to replace the above naglers with plossls but nothing beats the great TFOV. The great thing about this small set is that it can fit in small bum bag so no need for uber ultra extra resistant 100$ eyepiece case 🙂

Aaaahhh.. imagine yourself with a small dob, 3-4 eyepieces, in a lonely coast of a Greek island …

Isothermal clothing for winter observing

Running usually, at night time on a cliff near my home has put me into consideration regarding clothing for night observations in winter time. Temperature drops each day so we have to take some precautions. Well ,while you run you’re pretty warm already, so cold is not a serious problem but sweat can be a bugger. To solve this, most runners use isothermal light clothing. Weights little and  passes sweat in the outer layer so that skin remains dry and warm.

So what can we do if we stand still in the night on a hill/mountain at winter time with -3 or so celcius ? Most books suggest dressing like a bear or taking a portable alogon/gas heater and a portable electrical generator with you or even use chemicals on your skin to stay warm.. My opinion is that its highly impractical and a complete energy waster. This is why past generations have devastated nature..

When Im off to star watching for a whole night I usually dress lightly and with some tea in a thermos, I manage to stay warm and not end up with pneumonia in the morning. Lets imagine that human body is a 4 part machine. Feet, lower body part, upper body part and head. All must be protected from cold with feet being the most durable and head the most vunerable.

Feet: Mountain climber’s socks or even better hunter’s socks. Hunters socks are the best way protecting your feet from cold weather. The cost is ridiculous (about 3-10 Euros from Praktiker) and keeps the feet warm even in extreme weather. Remember that these socks are designed to keep warm (usually stationary) hunters. As for shoes climbing boots are light and sturdy but I find stability oriented athletic shoes more practical when there’s no snow.

Lower part: Jeans with lots of pockets, or woolen trousers and isothermal underwear are just fine. Isothermal underwear may cause itching but its natural i guess, except only if you’re allergic..a great percentage of its material is sheep wool.

Upper part: Isothermal light sweater and isothermal woolen gloves (or find a cheap pair and cut the finger covers to be able to hold your eyepieces/focuser), woolen sweater (sheep wool is the best – a constant reminder…), and a runner’s wind stopper jacket with inner woolen layer will do.

Head: Wool cap and scarf or buff in balaclava setup will do. Both in extreme conditions. Covering your mouth must be one of your first priorities since cold air will harm your lungs.

So the magic words are layers and wool. Most shepherds (at least in my country live on mountains) could bare cold because every piece of cloth on them was made from their primary resource, sheep wool.

The most technical in the above list is the thermal underwear, which can be found in various prices and qualities in extreme sports stores. Mine are able to withhold body heat at -9 Celcius tops and cost around 40 euros each (sweater and pants). There are others that are designed for -20 and -30 Celcius but are a bit expensive, starting at 70 euros each.

The whole idea is to be as light as possible or even better wear as less as possible, but manage to keep your body temperature stable. I believe that being lightweight, fit as possible and keep breathing from the nose, will help overcome sleep, cold and fatigue.

You might also consider doing some workout while you’re standing. Keeping the blood in constant flow will keep you warm enough. Walking around, a bit of stretching, moving arms in circular movements or even better some simple tai chi forms will help.

Also a Hobo stove is a very nice (ecological and fire safe) option if there’s not a house to stay. You can make one using an old small metal barrel or buy a commercial which might be more portable. Also the usage of the hobo stove does not greatly affect your night vision.
If you feel weird at any time or for whatever reason, stop. Killing oneself or losing your health is an unnecessary extremity for a hobby. If you want extremities start smashing light bulbs with police cars in view ;p

How to easily dark adapt your Laptop Screen and your Flashlights

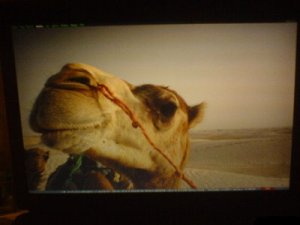
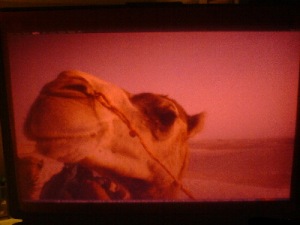
When im not lightly geared for an astronomy session, i consider my laptop to be an invaluable tool for observations, plus i find it extremely difficult to locate abell planetaries without it. But even if its a portable encyclopedia, i find it very disturbing when i have forgot to dark adapt the screen and have to waste an extra 20 minutes to achieve night vision. Usually I use a combination of low brightness / black-red desktop theme, which is a very nice way to have your eyes protected from light, but needs preparation from home in order to gain some time for your eyes. Some years ago a friend from Special Forces had told me of a simple way to dark adapt a flash light by using red plastic transparent sheets for presents or candies so why not use it for a laptop screen? Even with a default white colored theme and brightness at 100% it didnt broke my night vision and at the same time i was able to find everything in my programs without blinking. I use a 14″ laptop so I used a A4 transparent (try to get a clear one) envelope for papers and notes which i usually bring with me, with some blue tack.

dsc003962-clear

Sorry for the image quality but i hope that point taken.

dsc003971-red

In case the red plastic sheet is not an option (or you want to use both options) you may try some linux/windows based themes that can be found in some sites.

My suggestions

Gnome/XFCE : ClearLooks Black – Red

KDE: Red Kaffiend and Universe Crimson with some adjustments

Well i basically use dwm and stumpwm so my themes are custom in level of status bar/modeline.

Finally for Micro$oft Window$ users its not hard to create one of your own. Just set everything to black and fonts to red.

Also i’ve read somewhere that starry night software has such features that apply to global desktop colors.  Kstars or Xephem and Stellarium have something similar that applies only to the program frame.

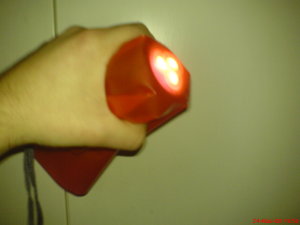
In the same way you can upgrade and use an old flashlight. Why spend 25 dollars for a special uber featurefull astronomical flashlight just to look cool (come on admit it..) when you can make one by yourself?! Keep the 25 bucks and gather up for more eyepieces! To make a red flashlight use some of the red plastic sheet to the flashlight to cover up the bulb/led and tie it with some rope as shown below. If the white color glare is too much, just put some extra sheets and tie them up.

Another option is to paint your flashlight bulb, red, with nail polish paint, or get a red bulb/led to replace your white one. If you try the nail polish option keep in mind that it might need several paint layers (5 or 6)  to get it to be as red as it needs.

dsc00403-redlightdsc004011-condom

Simple DIY planisphere

One of the most useful amateur astronomer’s tools, is the planisphere. In addition with star maps of objects that you might be interested in, you are able to identify a large part of the night sky. There are many ready made printable planispheres and star charts to get and print. The most known and used is in National Research Counsil of Canada, and one custom made by Toshimi Taki that can be found here. Another one that can be used to know how planispheres might be constructed can be found here. Another interesting way to view a planisphere customized for your country is via GoogleEarth.

So why should you make one by yourself and even sweat about it? Well the magic word (at least for me) is customization. Being able to make custom planispheres or star charts may help you easily focus in the subject you study/observe, change the colors to optimize visibility, change lines,borders or even constellation art. Another reason is the self confidence  you might feel, when you construct something that everybody has convinced you, you must BUY to be able to use. The custom planisphere that can be found in the Downloads page is an example. Its still an early version but i ll modify it as best i can. Its written in pp3 (a software that is used to create custom charts) and after a small comparison with a commercial (at least schematically) seems to be working (have to exhaustingly test that one). It lacks labels, days, months and divergence but they will be added in time. In the files section you can find the tex code that is provided by the pp3 script, which is also included.

Now to construct one. The guidelines of Mr. Toshimi Taki are simply brilliant but instead of wood i’d use plastic flexible sheets like the commercial ones. I want it to be waterproof and flexible without the danger of carelessly tearing it apart. Also i want it to be ultra portable. That means that i want to be able to roll it in a cylinder, put it in my pocket/camelback/backpack and be able to use it wherever i am, even in my running sessions. To be able to print it on a plastic sheet i would possibly go to a print shop and choose everything, from material to thickness but i guess its more practical and cheaper to use plastic sheets in your inkjet or laser printer. If you have the printer, the cost of plastic sheets in Amazon is 3.99 USD or you can visit you local bookstore. That way you can have many charts and planispheres or even a clone of the relatively expensive Uranometria with only four dollars.

I ll also try to upload some custom star charts. More updates to come…

A small linux astronomy software review

UPDATE: Another updated post with some new apps is available here.

Using linux as a main operating system can still be tricky sometimes, especially when you want to combine your job with your hobbies. There are many astronomy programs for unix/linux. A good example is that most of Nasa’s servers run Solaris, so unix had always the upper hand in the exploration of universe and of course in variable astrophysics calculations. Recently i ve read that nasa, runs solely Fedora Core for timing servers and for some other jobs, Mandriva. By reading interviews and such is easy to understand that nasa’s engineers and programmers dont have any os wars to worry about. If it works we stick to it. No updates, only stability. I strongly agree with that philosophy. Im using Slackware for nearly 9 years and i havent changed os because it simply does what im asking to do.

Most of the programs below are open source. I have also included some DOS programs that can be used via dosbox simulation.

Xephem is an ephemeris and planetarium, astronomy software which is a bit difficult to use at the beginning but it becomes a necessity afterwards. Many features icluding a really huge catalogue of stars, deep sky objects and data from AAVSO, SOHO. You can use (after conversion) the tycho2 and hipparchos catalogues, connect it to Guide Star Catalog (with 998,402,801 objects) or view a sky view using Digitized Sky Survey. Eehh not enough words….

Predict rocks my socks.. Its a satellite tracking and orbital prediction program. Very useful for any kind of satellite tracking you wanna do. Just grab a small scope and on to the roof.

SkyChart / Cartes du Ciel. No introductions needed. An astronomy software that is used by many, even though its still in beta (for linux) its very usable and with the addition of extra images and catalogues it can be your celestial encyclopedia.

Stellarium. A very good planetarium program that is used by many amateur astronomers and even in commercial planetarium projectors for educational porpuses. Many claim that its strictly newbie application, but i really believe that thats rubbish. With a default catalogue of over 600.000 stars, scripting, realistic atmosphere, additional catalogues of over 200.000.000 stars, nebulae,etc i dont think that its newbie..

Partiview is not exactly an astronomy only related project. Its an interactive, stereoscopic and 3d viewer. Its pretty fast and has a ton of uses. One of the most famous is Digital Universe. Take some time and check the “Uses of Partiview” section in the main site, believe me, you will be surprised by the uses in astrophysics, global networks or even machine learning.

Just Moon An experimental but highly usable lunar atlas similar to Virtual moon atlas. Very nice and simple program. I hope for some updates in the future.
(Note: if you still want to use Virtual Moon atlas go for the light version (3.5c) with wine)

PP3. Latex finds astronomy. One of the best celestial charts generator with very high graphical quality and uses latex. According to the author, PP3 is used for the maps of all constellations on Wikipedia. A small example is here. Even though the syntax that you may use to generate charts is not latex code its very simple and really fast to learn.

Siril is an image processing linux software (IRIS clone) that is used
by many astrophotographers. Even though you can still use gimp for that, Siril just makes life easier by using the features that we need most.

Skycalc is a small console calculator made for many quantities that observational astronomers need. Its very practical and light.

Newt is a newtonian telescope design program. Many atms(if not all) use it for their projects for its rich features and high data accuracy. You can use it to check for vignetting, optimizations of the diagonal size, calculations of the baffle size and a lot more. I use it with wine and never had a single glitch. 2 thumps up!

If you dont use a computer a lot with your observations be sure to have a calculator with you all the time. Saved me countless times.

If you require more, you may check my links, but i think that most of the above fulfill most of your base needs.
Of course if you cant find nothing that matches your criteria, you may write something on your own and share it with others 🙂 . A good example is scripting in any language or engine such as GnuOctave, Scilab and Matlab.

Which is the best telescope ? …Dobsonians ? Maybe? …

A question asked by amateur astronomers all the time, beginners and experienced. Well the best answer finally is the scope that you use all the time. The same goes for bicycles. The same goes for everything. As a species we are nomadic, expansionist and of course garbage collectors. We enjoy having something for every situation. But back to the subject..

There are 2 types of scopes. Reflectors and refractors. Reflectors use mirrors, refractors use lens. Also there are 2 types of mountings. Equatorial and Altazimuth. There are some reflector types..Newtonians, Cassegrains (Maksutov-Cassegrain, Ritchey-Chrétien(Hubble telescope) and Dall-Kirkham).

One type of reflector that uses the altazimuth mounting and the Newtonian type tube is the Dobsonian telescope. Taken its name by John Dobson, a former monk of the Ramakrishna Order and amateur astronomer, this scope is built with simplicity in mind, is constructed by cheap materials and is mainly used for deep sky and planetary observing. Unfortunately we live in a world that money leads the way. But the sky is ours and the dobsonian is a very good way to observe it. Most dobsonians are atm (amateur telescope making) projects and have 3 main parts. The tube, mirror box and rocker box (mount). All parts can be easily made using a hammer and a saw. As for the mirror you can grind one by yourself or buy a readily made one. Of course there are commercially made Dobsonians like the Meade Lightbridge and others..

Yesterday in science.nasa.gov there was an article regarding mirror making using moon dust. Its not hard to think that future generations in moon with no special components will start building dobsonians for their observations..

Of course nothing is perfect and there are some tradebacks. For starters its pretty difficult to motorize this kind of mounting if you want to use it for astrophotography. But there are commercial(expensive) products to make your life easier. Or you can make a DIY project 😉 Also there are issues regarding heavy finderscopes or uncommon eyepieces that will alter balance. There’s a solution to that too by adding counterweight to the rocker box.

This video by truemartian makes a small comparison:


Well.. its not hard to decide which is the most practical enjoyable and easy to transport.

This is considered to be the largest made dobsonian.. A magnification of 1600x has been achieved.. and you can actually make it!!!

Note: There are many good telescopes of any kind type or mounting. The above are just my views of a scope that has some more pros than cons.