ad hoc-ing around

The past days i got a wireless adapter and setup an ad hoc network to be able to use some wireless devices. There’s still the matter of WEP vs WAP(2) thing but nevertheless with a good password you’re good to go in both cases. Also there’s the option to increase/decrease the signal strength so security is just a matter of usage.

Anyway, i made a small console script for WEP and a bit of configuration for WAP(wpa_supplicant) and :

#!/bin/bash
#
# TODO: Option to set signal strength
#
 
echo "Create Ad-Hoc Network"
echo "_____________________"
echo

INTERFACE="wlan0"

echo -n "Type prefered ESSID (e.g. My Network, Conan's home, etc): "
read ESSID
echo -n "Insert prefered Mode (e.g. ad-hoc, master, managed etc): "
read MODE
echo -n "Channel (e.g.auto, 3, etc)  : "
read CHANNEL
echo -n "Desired pass key : "
read KEY
echo -n "IP Address : "
read IP_ADDRESS
echo -n "Netmask : "
read NETMASK
echo

ifconfig $INTERFACE up
ifconfig $INTERFACE $IP_ADDRESS netmask $NETMASK
iwconfig $INTERFACE mode $MODE
iwconfig $INTERFACE essid $ESSID
iwconfig $INTERFACE channel $CHANNEL


echo "Setting up key passphrase.."
iwconfig $INTERFACE key $KEY

echo -n "Seems that all is good.."
echo -n "Press any key to continue..."
read

Yeah i know its very simple but it works for me ๐Ÿ˜› If one of the steps fails you ll see an indication.

As for WPA i changed a bit my wpa_supplicant.conf to look like this:

ctrl_interface=/var/run/wpa_supplicant

# By default, only root (group 0) may use wpa_cli

ctrl_interface_group=0
eapol_version=1
ap_scan=2
fast_reauth=1

# WPA protected network, supply your own ESSID and WPAPSK here:
network={
#  scan_ssid=0
  ssid="CONAN-DUDE"
  mode=1
  proto=WPA2
  key_mgmt=WPA-PSK
  pairwise=CCMP TKIP
  group=CCMP TKIP #WEP104 WEP40
  psk="*****************************"
}

# Plaintext connection (no WPA, no IEEE 802.1X),
# nice for hotel/airport types of WiFi network.
network={
  key_mgmt=NONE
  priority=0
}

and just issued the below (in a script)

killall wpa_supplicant
ifconfig wlan0 down
ifconfig wlan0 up
iwconfig wlan0 essid "CONAN-DUDE" channel auto
iwconfig wlan0 mode ad-hoc
wpa_supplicant -D wext -iwlan0 -dd -Bw -c /etc/wpa_supplicant.conf
dhclient wlan0

I have the intel 3945 wireless adapter so wext is the option for it.
For testing i run
iwlist wlan0 scan

I still have a masochistic preference for wired networks though ;p

Musca – A new tiling window manager

Searching for something in freshmeat a couple of days ago, i stumbled upon a small tiling window manager named Musca. You’ll say “What? Another one? For what reason?”. Hey! Why not? Well we all know that the 3 kings are ratpoison, dwm and ion. All features that were first introduced by them made tiling window management what it is today. Now take all the features that you actually liked in all of them and implement them in something new. The result is Musca. Musca is a tiling window manager that is written from scratch in C and has many features including:

  • Extremely small (binary is 97Kb and zipped package 37Kb), light and elegant
  • Simple configuration via config.h (Yes it needs recompiling)
  • Manual window tiling, that means no restrictions on layout setups
  • Group management support, that means no pesky tagging but actual groups
  • Simple mouse tasking, following click to focus philosophy
  • Frame management is followed by color indication so you actually know in what mode your frames are.(ie the catch-all mode that forces all windows opened in a specific frame is green)
  • Musca has multiscreen support out of the box and can manage groups to screens automatically
  • Uses dmenu as requirement for windows,groups and wm management
  • No obstructive status bars, panels, and such but you can use one if you like (e.g. trayer,dzen2 etc)
  • It is named after a star constellation…Yes that’s a plus. ๐Ÿ˜€
  • A nice feature called unmanaged_windows ( remember remember ๐Ÿ˜€ ). That let’s you make musca ignore windows and not assign them in frames. ๐Ÿ˜‰

I really like Musca. Its light, small and configurable. Its still in devel state but its very usable and i have put aside stumpwm for now.ย  I had all my key bindings configured in seconds and Musca’s engine/group management philosophy was like second nature since, i use ratpoison and stumpwm. ๐Ÿ™‚

Musca is actively developed and created by Sean Pringle. His website can be found here where he hosts his projects and other fun stuff.

UPDATE: New version of Musca, as of 9th March, is out with a *TON* of features that simplifies a lot of stuff including

  • floating support (via stack Musca command)
  • Added new commands!
  • Layout saving..thats means ENDLESS CAPABILITIES!!
  • Musca now has an external command interface for client management
  • Now you can undo layouts ๐Ÿ˜€ No more accidental layout windows
  • External startup configuration file to configure your window manager
  • Its getting better and better each day!! ๐Ÿ˜€

UPDATE:ย  The post is a bit old of course. Musca is more mature now and has even more features ๐Ÿ˜€

A pic of musca running on my Slackware 12.2 Laptop

2009-03-09-190658_1280x800_scrot1

Diy newtonian collimation tool

This is a post about making a simple collimator for your newtonian/dobsonian telescope. I will not go through the process of telescope collimation which can be found in an excellent article, here. Its easy and it costs nothing. It might not be as cool as a laser collimator but it needs no battery and after some time and with experience you may be able to collimate your telescope perfectly. It’s a method that it already has been described in some forums and books but it harms none to be repeated.

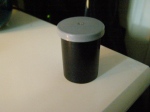
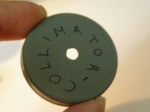
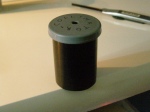
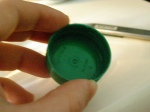
All you need is a film can (tube length is not an issue) and a small knife or scissors. Open a small hole (3-4mm) to the center of cap’s can. It usually is marked already so you’ll not have to make any geometrical calculations for that. You also need to cut the bottom part of the cap. So why a film can? Because it has the diameter of an eyepiece (1 1/4in-3cm) so it fits nice on your focuser.

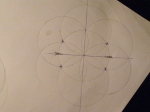
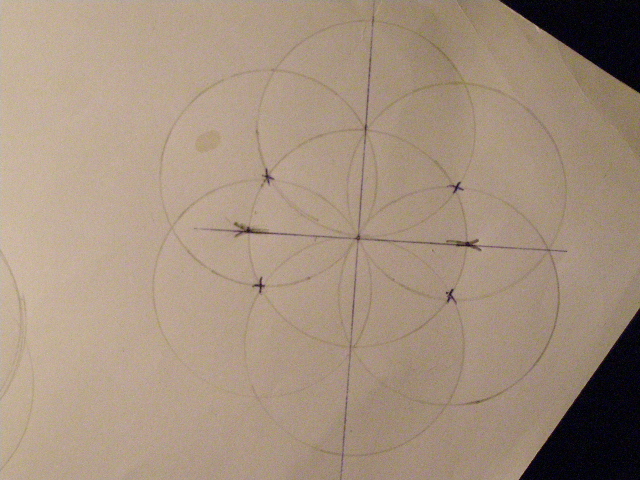
(Optional) If you want, theres an option to make your handmade collimator, cross haired. You ll be able to “target” the center of your mirror that way and you ll minimize the effort of collimation. Thats easy too! You just have to calculate the points of the circle where you ll place the threads. I have made a small drawing to show you the way. All you need to do is to draw circles of the same radius, centered in the perimeter of your main circle(film can). See the 4 x’s ? All you need to do, is to find the middle point of the distance between them(in pairs). There’s another way, like drawing more circles around until you have something like a starry cross in your circle(that’s easy too-if you want it just drop me a comment) but i was in a hurry and i made it as in the photo (took me some seconds to draw that). When you have found the magic spots just make 4 small cuts and place in them, 2 small pieces of thread.

Thats all! Just saved yourself 20-50 USD or euro. Soon, i ll upload full plans of a Cheshire collimation tool.

p2210363<

DIY Tripod balancer – Cheap, fast, practical and productive

Today in the morning i went shopping down town. Being there i located an astronomy shop that i used to visit its website more of out of habit and to see how astronomy equipment is faring here.. I always thought that they try to keep up with all astronomy shops world wide and that they try to expand the astronomy idea to all ppl. Of course not. Most of its working stuff are very experienced sellers that were forced to study telescope mechanics (some), following the “aggressive selling” philosophy (which i hate), plus its prices are ridiculous. Being there, the salesman told me of a mechanism that kept the tripod sturdy and with no vibrations. Well, i asked for the price, and when i was told, i fled running and laughing. He was trying to sell me plastic tripod leg enhancements for 60 euro..(77 USD). To tell the truth i don’t know if that’s a cheap or expensive component, or if it does reduce THAT much, vibrations, but i would never buy something like that at a price i would normally buy a relatively cheap eyepiece.


What i do to my tripod?(I am a dobsonian lover but i still use my old trustful newtonian). Its plain physics and its lots of fun.
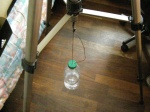
I took a half filled (with water..you can use it to water your plants later ๐Ÿ˜‰ ) plastic bottle and made a small hole in the center of the cap. Then pass a piece of rope from the center of the cap and tie it under your tripod base holder and in between the tripod legs. Water will absorb vibrations through the rope and you will have a much stabler experience even in mild wind conditions. More $$ saved ^_^ .. must find that clave eyepieces now…

Stumpwm – mania

After some years with fluxbox (with tons of eye candy) and the last 2 years using a combo of ratpoison and dwm, I finally ended up with stumpwm. Stumpwm is the Lisp(y) brother of ratpoison and its actively maintained by Shawn Betts. Ratpoison still kicks buttocks but stumpwm has more features and since its based on lisp, is more configurable[and since im learning lisp it’s good exercise!!]. Most ppl use laptops in observations and i think its a good idea to use a tiling window manager like ratpoison or stumpwm. All my astronomy programs run smoothly and in fullscreen (which is very good for my eyes), plus i have keybinds for calculations that show results in the stumpwm engine.. which is very practical. Of course any kind of coding becomes better and the reason is the absence of obstructive applets, eye-candy panels and such. You have the space to focus on your work which might be a maximized window or a custom layout that suits your need.

In its default state is very spartan and it might require a day or two to fully bringย  it to your liking. Also according to this post there’s floating support added in the git version. It works pretty well with no resizing yet, but that’s not a problem.. You can check my .stumpwmrc in the ‘Downloads’ page and a screencast which shows a portion of stumpwm’s features, made by male in here. Below, a screenshot with stumpwm running on slack 12.2

UPDATE: Just changed modeline readbility.. seems sexier now..

2009-02-12-145643_1280x800_scrot1

Minimalistic Set of Eyepieces

I spent some time the past days searching for a minimalistic eyepiece set, in order to minimize the weight added in my observation sessions with my 10″ f/5 travel dob. After all christmas is near and i want gifts!! I wanted to gather up three or four pieces including a barlow to be able to achieve as many as possible and variable magnifications as possible. After doing some research using different calculations for a set of different telescope magnifications i ve reached the following result..

– 32mm Televue Plossl (or maybe a GSO but anything in that length..) as a finder, starhopper, DSO allarounder… If you got the buck hit a 27mm Panoptic…its great.. This eyepiece will be replaced by a 2″ derivative.. It gives me 39.7x, 79.4x Barlowed (but i dont need that) and a wooping 1.25ยบ true field of view.

– 13mm Televue Nagler T6 (everything in that length with a bit of wide field). This one is ideal for bright objects, movement observing, comet hunting and others. One of the grooviest eyepieces ๐Ÿ˜€ It gives me 98x, 196x barlowed and 0.83ยบ true field of view.. not bad.. So with one eyepiece i have almost 100x and 200x..


– 9mm Televue Nagler T6 (same as above). With this i can take a close look in almost anything.. from moon to nebulae and galaxies. It provides me 141.1x, 282.2x and 0.56ยบ true field of view.

– 9mm Baader/UO orthoscopic (_optional_… i would take that with me only to study the moon or close planets..). This is ideal for planetary and moon work.. I can achieve very good magnifications but i have to move the secondary cage to stay in track of orbit. Very small field of view but great views and colors…

– Barlow 2x. Provides more magnification and a bit of FOV. Its a necessity in a small all arounder set. My opinion goes to Televue Barlow 2x or if you want a shorty i would go for Celestron Ultima 2x.

Im not a televue junkie… My favorite views were from Clave eyepieces but i have not been able to aquire one.. ๐Ÿ˜ฆ The ideal and most cost efficient for me is to replace the above naglers with plossls but nothing beats the great TFOV. The great thing about this small set is that it can fit in small bum bag so no need for uber ultra extra resistant 100$ eyepiece case ๐Ÿ™‚

Aaaahhh.. imagine yourself with a small dob, 3-4 eyepieces, in a lonely coast of a Greek island …

Isothermal clothing for winter observing

Running usually, at night time on a cliff near my home has put me into consideration regarding clothing for night observations in winter time. Temperature drops each day so we have to take some precautions. Well ,while you run you’re pretty warm already, so cold is not a serious problem but sweat can be a bugger. To solve this, most runners use isothermal light clothing. Weights little andย  passes sweat in the outer layer so that skin remains dry and warm.

So what can we do if we stand still in the night on a hill/mountain at winter time with -3 or so celcius ? Most books suggest dressing like a bear or taking a portable alogon/gas heater and a portable electrical generator with you or even use chemicals on your skin to stay warm.. My opinion is that its highly impractical and a complete energy waster. This is why past generations have devastated nature..

When Im off to star watching for a whole night I usually dress lightly and with some tea in a thermos, I manage to stay warm and not end up with pneumonia in the morning. Lets imagine that human body is a 4 part machine. Feet, lower body part, upper body part and head. All must be protected from cold with feet being the most durable and head the most vunerable.

Feet: Mountain climber’s socks or even better hunter’s socks. Hunters socks are the best way protecting your feet from cold weather. The cost is ridiculous (about 3-10 Euros from Praktiker) and keeps the feet warm even in extreme weather. Remember that these socks are designed to keep warm (usually stationary) hunters. As for shoes climbing boots are light and sturdy but I find stability oriented athletic shoes more practical when there’s no snow.

Lower part: Jeans with lots of pockets, or woolen trousers and isothermal underwear are just fine. Isothermal underwear may cause itching but its natural i guess, except only if you’re allergic..a great percentage of its material is sheep wool.

Upper part: Isothermal light sweater and isothermal woolen gloves (or find a cheap pair and cut the finger covers to be able to hold your eyepieces/focuser), woolen sweater (sheep wool is the best – a constant reminder…), and a runner’s wind stopper jacket with inner woolen layer will do.

Head: Wool cap and scarf or buff in balaclava setup will do. Both in extreme conditions. Covering your mouth must be one of your first priorities since cold air will harm your lungs.

So the magic words are layers and wool. Most shepherds (at least in my country live on mountains) could bare cold because every piece of cloth on them was made from their primary resource, sheep wool.

The most technical in the above list is the thermal underwear, which can be found in various prices and qualities in extreme sports stores. Mine are able to withhold body heat at -9 Celcius tops and cost around 40 euros each (sweater and pants). There are others that are designed for -20 and -30 Celcius but are a bit expensive, starting at 70 euros each.

The whole idea is to be as light as possible or even better wear as less as possible, but manage to keep your body temperature stable. I believe that being lightweight, fit as possible and keep breathing from the nose, will help overcome sleep, cold and fatigue.

You might also consider doing some workout while you’re standing. Keeping the blood in constant flow will keep you warm enough. Walking around, a bit of stretching, moving arms in circular movements or even better some simple tai chi forms will help.

Also a Hobo stove is a very nice (ecological and fire safe) option if there’s not a house to stay. You can make one using an old small metal barrel or buy a commercial which might be more portable. Also the usage of the hobo stove does not greatly affect your night vision.
If you feel weird at any time or for whatever reason, stop. Killing oneself or losing your health is an unnecessary extremity for a hobby. If you want extremities start smashing light bulbs with police cars in view ;p

How to easily dark adapt your Laptop Screen and your Flashlights

When im not lightly geared for an astronomy session, i consider my laptop to be an invaluable tool for observations, plus i find it extremely difficult to locate abell planetaries without it. But even if its a portable encyclopedia, i find it very disturbing when i have forgot to dark adapt the screen and have to waste an extra 20 minutes to achieve night vision. Usually I use a combination of low brightness / black-red desktop theme, which is a very nice way to have your eyes protected from light, but needs preparation from home in order to gain some time for your eyes. Some years ago a friend from Special Forces had told me of a simple way to dark adapt a flash light by using red plastic transparent sheets for presents or candies so why not use it for a laptop screen? Even with a default white colored theme and brightness at 100% it didnt broke my night vision and at the same time i was able to find everything in my programs without blinking. I use a 14″ laptop so I used a A4 transparent (try to get a clear one) envelope for papers and notes which i usually bring with me, with some blue tack.

dsc003962-clear

Sorry for the image quality but i hope that point taken.

dsc003971-red

In case the red plastic sheet is not an option (or you want to use both options) you may try some linux/windows based themes that can be found in some sites.

My suggestions

Gnome/XFCE : ClearLooks Black – Red

KDE: Red Kaffiend and Universe Crimson with some adjustments

Well i basically use dwm and stumpwm so my themes are custom in level of status bar/modeline.

Finally for Micro$oft Window$ users its not hard to create one of your own. Just set everything to black and fonts to red.

Also i’ve read somewhere that starry night software has such features that apply to global desktop colors.ย  Kstars or Xephem and Stellarium have something similar that applies only to the program frame.

In the same way you can upgrade and use an old flashlight. Why spend 25 dollars for a special uber featurefull astronomical flashlight just to look cool (come on admit it..) when you can make one by yourself?! Keep the 25 bucks and gather up for more eyepieces! To make a red flashlight use some of the red plastic sheet to the flashlight to cover up the bulb/led and tie it with some rope as shown below. If the white color glare is too much, just put some extra sheets and tie them up.

Another option is to paint your flashlight bulb, red, with nail polish paint, or get a red bulb/led to replace your white one. If you try the nail polish option keep in mind that it might need several paint layers (5 or 6)ย  to get it to be as red as it needs.

dsc00403-redlightdsc004011-condom

Simple DIY planisphere

One of the most useful amateur astronomer’s tools, is the planisphere. In addition with star maps of objects that you might be interested in, you are able to identify a large part of the night sky. There are many ready made printable planispheres and star charts to get and print. The most known and used is in National Research Counsil of Canada, and one custom made by Toshimi Taki that can be found here. Another one that can be used to know how planispheres might be constructed can be found here. Another interesting way to view a planisphere customized for your country is viaย GoogleEarth.

So why should you make one by yourself and even sweat about it? Well the magic word (at least for me) is customization. Being able to make custom planispheres or star charts may help you easily focus in the subject you study/observe, change the colors to optimize visibility, change lines,borders or even constellation art. Another reason is the self confidenceย  you might feel, when you construct something that everybody has convinced you, you must BUY to be able to use. The custom planisphere that can be found in the Downloads page is an example. Its still an early version but i ll modify it as best i can. Its written in pp3 (a software that is used to create custom charts) and after a small comparison with a commercial (at least schematically) seems to be working (have to exhaustingly test that one). It lacks labels, days, months and divergence but they will be added in time. In the files section you can find the tex code that is provided by the pp3 script, which is also included.

Now to construct one. The guidelines of Mr. Toshimi Taki are simply brilliant but instead of wood i’d use plastic flexible sheets like the commercial ones. I want it to be waterproof and flexible without the danger of carelessly tearing it apart. Also i want it to be ultra portable. That means that i want to be able to roll it in a cylinder, put it in my pocket/camelback/backpack and be able to use it wherever i am, even in my running sessions. To be able to print it on a plastic sheet i would possibly go to a print shop and choose everything, from material to thickness but i guess its more practical and cheaper to use plastic sheets in your inkjet or laser printer. If you have the printer, the cost of plastic sheets in Amazon is 3.99 USD or you can visit you local bookstore. That way you can have many charts and planispheres or even a clone of the relatively expensive Uranometria with only four dollars.

I ll also try to upload some custom star charts. More updates to come…

Be right back!

Been away away for a while but im working on some new astronomy and linux tweaks and completing the travel dob guide.ย  Im considering adding a new subject category about running with tips and tricks for powering up(ie breathing). As always comments always help adding correct and objective info. Also i ll change the layout and might add some features for easy calculations.

Imagine running 5k uphill with a camelback including pocket binoculars and a star chart. Groovy huh?! ๐Ÿ˜‰